Win Free Dogecoins every hour!
Welcome to the Blog www.rajaunlock.club. Masuk ke www.rajaunlock.club DI SINI.

Total Tayangan Laman

Welcome Guys

Blog Archive

Showing posts with label unlock. Show all posts

[Sukses] Cara Mudah Root dan Unlock Andromax A (v11.7 - v12.1) Versi Dewa

Written By Raja unlock on Sunday, March 19, 2017 | March 19, 2017

Bagikan Artikel Ini :
Raja Unlock | Pada kesempatan kali ini saya akan membagikan tutorial cara root Andromax A (A16C3H) dengan versi nomor bentukan v11.7 - v12.1 atau yang dikenal sebagai versi dewa pada firmware milik Smartfren. Dimana dalam versi tersebut dikenal sebagai versi dewa karena tingkat keamanannya cukup kuat untuk bisa dioprek, banyak yang sudah melakukan downgrade namun hasilnya smartphone Andromax A menjadi hard brick atau mati total. Jika sebelumnya pada versi v5.6, v5.3, v5.0, v4.9, v4.3, dan v4.1 masih bisa di downgrade ke v3.5 namun berbeda dengan versi v11.7 - v12.1 terbaru ini.

Niat Smartfren memproduksi Andromax A 4G LTE dengan harga murah ini supaya penjualan kartu Smartfren laku untuk dibeli pengguna Andromax, namun sayangnya strategi Smartfren untuk menjual kartu Smartfren ini tidak berjalan lurus karena banyak pengguna yang melakukan unlock ke GSM sehingga pengguna bisa menggunakan provider selain Smartfren. Maka dari itu, pihak Smartfren meningkatkan keamanan firmware Andromax A lebih kuat dan hasilnya cukup menjanjikan karena dalam versi terbaru ini pengguna Andromax A sudah tidak bisa melakukan downgrade ke v3.5 maupun melakukan rooting.

Andromax A
Namun baru-baru ini ada aplikasi yang mampu membuka hak akses root Andromax A (v11.7 - v12.1), meskipun root yang dihasilkan sementara alias tidak permanen namun setidaknya ini memberikan nafas lega bagi pengguna Andromax A (v11.7 - v12.1). Semua butuh proses dan kita hanya bisa menunggu para mastah opreker berkreasi untuk menuntaskan masalah pada Andromax A versi dewa tersebut. Nah, meskipun tidak permanen melakukan root Andromax A ini bisa Anda gunakan apabila Anda membutuhkan hak akses root untuk menjalankan aplikasi yang membutuhkan izin SuperSU.

Baca juga:
Keuntungan rooting tidak permanen adalah Anda tidak perlu susah payah melakukan unroot untuk klim garansi, setelah di restart atau reboot Andromax A kembali normal. Jika Anda ingin melakukan root lagi, Anda bisa mengulangi cara yang sama. Dan jika Anda tidak mau capek root maka jangan pernah di restart atau reboot. Untuk memulai root dengan aplikasi CRooWt - DirtyCowAPK ini Anda wajib memasang SD Card/MicroSD. Baiklah langsung saja, berikut cara cara root Andromax A (v11.7 - v12.1) versi Dewa tanpa PC.

Cara Root Andromax A (v11.7 - v12.1)

  1. Download aplikasi CRooWt APK Terbaru.
  2. Kemudian install seperti biasanya namun setelah selesai jangan dibuka terlebih dahulu.
  3. Lepaskan SD Card melalui Pengaturan, lalu baru buka aplikasi CRooWt .
  4. Pilih Get Root kemudian pilih 1 (Only lollipop 32 bit).
  5. Tunggu sampai proses selesai, jika muncul notifikasi Unmount SD Card silahkan pilih saja OK.
  6. Setelah itu pasang kembali SD Card melalui pengaturan, tunggu sampai terdeteksi kembali.
  7. Kemudian back sampai masuk ke aplikasi CRooWt tadi dan lihat hasilnya.
  8. Jika ada tulisan Succes Root berarti Andromax A berhasil di root. Silahkan cek ⟶ Cara cek Android yang sudah di root atau belum.
Bagaimana, mudah bukan? Jika kalian menganggap tutorial ini mneyebabkan brick atau bootloop, itu salah! karena ini hanya metode root jadi aman-aman saja kalau dicoba. Kalau takut jangan dicoba tunggu saja sampai matahari jadi dingin.... Semoga bermanfaat "Do With Your Own Risk".
March 19, 2017 | 0 comments | Read More
Comments
0 Comments
Raja Unlock Raja Unlock Updated at: March 19, 2017

Tool unlock samsung free versi 2 (one klik)

Written By Raja unlock on Friday, March 22, 2013 | March 22, 2013

Bagikan Artikel Ini :


Samsung pattern unlocker free ////// One Click Pattern Unlock SamsunG v2 //////

[+]ADDED List Model Supported
[+]ADDED Android Factory Settings – Phone Lock Disable
[+]ADDED Infineon Phones Factory Settings – Phone Lock Disable by USB or RJ45
[+]ADDED Broadcom BCM21xx Factory Settings – Phone Lock Disable
[+]ADDED Broadcom BCM2155 Factory Settings – Phone Lock Disable
[+]ADDED Button For Capture Screen Program


download free from here
March 22, 2013 | 2 comments | Read More
Comments
2 Comments
Raja Unlock Raja Unlock Updated at: March 22, 2013

LGTool version v2.07 released

Written By Raja unlock on Thursday, March 7, 2013 | March 07, 2013

Bagikan Artikel Ini :

LGTool version v2.07 released

World’s first Direct Unlock (MEP0 reset), Repair IMEI and Debrand functions for BlackBerry phones!
Added flash FW support for more new LG phones; more Samsung unlock; Motorola, HTC & LG IMEI calc improved.


New for LGTOOL direct services:

BlackBerry 9810, 9850, 9860, 9900, 9930, 9981, 9620 - All World's first!
- Read Unlock Codes for all existing & future versions (by microSD cable)!
- Direct Unlock / MEP0 reset (by microSD cable)
- Repair IMEI (by microSD cable)
- Remove Operator's Logo / Debranding (by microSD cable)
[/COLOR]

LG F100L, F100S, F12OK, F120L, F120S, L01D, L06D, L06DJOJO, P930, P935, P936, SU640
- Flash Firmware

New for LGTOOL remote services:

LG D700, E975R - All World's first!
- calculate unlock codes

New for SGTOOL direct services:

Samsung I437, T779, T699 - No root!
- Code Reading
- Direct Unlock

Samsung P3105, P3105T
- Direct Unlock

Samsung N7100T, S5302B, SHV-E210K, SHV-E210L, SHV-E210S
- Imei Repair
- Direct Unlock

Samsung S3570
- Read E2P Codes

Other changes:
- Add Auto TempRoot Android 2.1 and 2.2 Samsung phones
- Updated Repair NVM Files
- Added 182 Samsung Android firmwares for fast direct unlock
- Changed Comport Detection System
- Fixed I8190 Root Problem (now also works with SU)
- Motorola calc algo improved
- LG calc algo improved
- HTC calc algo improved

Download LGTOOL&SGTOOL from the Official website or from Rapidshare
March 07, 2013 | 0 comments | Read More
Comments
0 Comments
Raja Unlock Raja Unlock Updated at: March 07, 2013

UNLOCK Sony Ericsson W660i CID 53

Written By Raja unlock on Tuesday, January 22, 2013 | January 22, 2013

Bagikan Artikel Ini :

Patching Sony Ericsson W660i CID 53

Cara UNLOCK atau disebut juga PATHING merupakan tahap awal untuk ajang modifikasi HP. Saya sebagai pemakai HP Sony Ericsson w660i CID 53 akan sedikit sharing untuk modofikasi HP.
Sebelum memulai siapkan dahulu bahan yang dibutuhkan, yaitu:
> FAR Manager + JD Flasher [ software ]
> Main Firmware [ merupakan file *.mbn sesuai yang dimiliki ]
> Break_w660i R8BE001_GENERIC_FY [ khusus w660i CID 53 ]
> Executor Upgrade [ khusus w660i CID 53 ]
> Quick_Acsses.vkp
Tahap Unlock/Patching Bismillahirrahmaanirrahiim.
Sediakan kabel usb [ port DCU-60 ] kemudian buka aplikasi FAR Manager dalam folder FAR Manager + JD Flasher yang sudah diextrack.
1.Setelah Far Manager tampil di dekstop tekan Alt +F1 pada keyboard.
2.Lalu pilih subtab just da flasher
3.Pilih :
- script : db2020.
- port : DCU-60.
- speed : 921600.
Lalu klik {jump down into a large rabbit-hole}.
4.Setelah itu matikan hp anda dan tekan tombol-C pada keypad hp [ jangan dilepas ] sambil colokan kabel usb [ hp dalam keadaan mati ] dan tombol-C boleh dilepas.
5.Pilih OFLASH.
6.Sekarang cari file BREAK_W660_R8BE001_MAIN_GENERIC_FY_RED53.mbn dengan cara double klik ".." dijendela kanan.
7.Kalau sudah ketemu drag file tersebut ke jendela kiri.
8.Sekarang klik {copy}.
9.Lalu klik { yeah, flash it} dan tunggu sampai proses mengcopy selesai, dan klik {ok}.
10.Sekarang keluar dengan cara double klik ".." di jendela kiri dan tekan yes.
11.Lepaskan kabel usb dari hp dan jangan menghidupkan hp.
12.Tahap selanjutnya yaitu memasukan cutom upgrade dengan cara seperti pada tahap no 1 - 4. Dan pada jendela tersebut pilih ofs.
13.Pilih tpa/preset/custom.
14.Copy Semua File dalam folder copy to phone dengan cara klik kanan sehingga warnamya menjadi kuning lalu drag ke jendela kiri seperti pada tahap no 7 lalu klik { copy }.
15.Setelah selesai mengcopy klik ok lalu keluar dari jendela seperti no 9 dan 10.
16.Lepaskan koneksi hp dari kabel usb dan hidupkan hp lalu pergi ke permainan dan pilih executor [ hp akan mati dengan sendirimya dan jangan menghidupkannya lagi].
17.Koneksikan hp seperti tahap no 1 dan 2, lalu pilih :
- sript : qa2020.
- port : DCU-60.
- speed : 921600.
18.Lalu klik {jump down into a large rabbit-hole}.
19.Pilih bflash.
20.Copy file *mbn. sesuai main firmware hp anda, sebagai contoh saya pakai milik saya seperti ini [ W660_R8BB001_MAIN_GENERIC_FY_RED53.mbn ]
Lalu copy ke jendela kiri sperti mengcopy pada tahap sebelumnya.
21.Copy file Quick_access.vkp ke jendela kiri sperti mengcopy pada tahap sebelumnya. Setelah selesai anda harus keluar dahulu dari FAR.
22.Lalu tekan yes dan sekarang anda boleh menghidupkan HP anda lalu ucapkan hamdalah karena unlock hand phone sudah selesai dan sekarang hand phone anda siap di modifikasi.
January 22, 2013 | 0 comments | Read More
Comments
0 Comments
Raja Unlock Raja Unlock Updated at: January 22, 2013

Unlock All LG Models

Written By Raja unlock on Saturday, January 19, 2013 | January 19, 2013

Bagikan Artikel Ini :
Unlock All LG Models


This unlocker software tools can unlock most of all LG mobile phone products,this a free software and only used on LG mobile phones.

Unlock All LG Models
January 19, 2013 | 0 comments | Read More
Comments
0 Comments
Raja Unlock Raja Unlock Updated at: January 19, 2013

Free unlock IMEI -- LoginPlus [FREE For TEST] Online Unlock

Written By Raja unlock on Saturday, December 29, 2012 | December 29, 2012

Bagikan Artikel Ini :
Hi by all, i need test of this software for unlock by IMEI various Phonemodels.


free LOG'S I gift you for exchange of TEST Result!


Supported phonemodels list :

Alcatel OT-090
Alcatel OT-103
Alcatel OT-104
Alcatel OT-105
Alcatel OT-106
Alcatel OT-108
Alcatel OT-109
Alcatel OT-112
Alcatel OT-113
Alcatel OT-117
Alcatel OT-140
Alcatel OT-150
Alcatel OT-203
Alcatel OT-203E
Alcatel OT-204
Alcatel OT-205
Alcatel OT-206
Alcatel OT-208
Alcatel OT-209
Alcatel OT-213
Alcatel OT-214
Alcatel OT-214W
Alcatel OT-216
Alcatel OT-217
Alcatel OT-217D
Alcatel OT-222
Alcatel OT-223
Alcatel OT-228
Alcatel OT-250
Alcatel OT-252
Alcatel OT-255
Alcatel OT-255D
Alcatel OT-262
Alcatel OT-268
Alcatel OT-280
Alcatel OT-282
Alcatel OT-292
Alcatel OT-296
Alcatel OT-300
Alcatel OT-303
Alcatel OT-304
Alcatel OT-305
Alcatel OT-306
Alcatel OT-308
Alcatel OT-310
Alcatel OT-311
Alcatel OT-312
Alcatel OT-315
Alcatel OT-315M
Alcatel OT-317D
Alcatel OT-318D
Alcatel OT-319
Alcatel OT-352
Alcatel OT-355
Alcatel OT-355D
Alcatel OT-356
Alcatel OT-358
Alcatel OT-358D
Alcatel OT-360
Alcatel OT-361
Alcatel OT-362
Alcatel OT-363
Alcatel OT-380
Alcatel OT-383
Alcatel OT-385
Alcatel OT-385D
Alcatel OT-385J
Alcatel OT-390
Alcatel OT-455
Alcatel OT-505
Alcatel OT-505K
Alcatel OT-506
Alcatel OT-506D
Alcatel OT-508
Alcatel OT-540
Alcatel OT-541
Alcatel OT-543
Alcatel OT-556
Alcatel OT-565
Alcatel OT-565K
Alcatel OT-585
Alcatel OT-585A
Alcatel OT-585D
Alcatel OT-585DF
Alcatel OT-585F
Alcatel OT-595
Alcatel OT-595D
Alcatel OT-600
Alcatel OT-602
Alcatel OT-602D
Alcatel OT-606
Alcatel OT-650
Alcatel OT-660
Alcatel OT-665
Alcatel OT-668
Alcatel OT-706
Alcatel OT-708
Alcatel OT-710
Alcatel OT-710D
Alcatel OT-710K
Alcatel OT-7110
Alcatel OT-720
Alcatel OT-720D
Alcatel OT-756
Alcatel OT-799
Alcatel OT-800
Alcatel OT-802
Alcatel OT-802Y
Alcatel OT-803
Alcatel OT-803D
Alcatel OT-806
Alcatel OT-806D
Alcatel OT-807
Alcatel OT-807D
Alcatel OT-808
Alcatel OT-808G
Alcatel OT-808M
Alcatel OT-809
Alcatel OT-810
Alcatel OT-8107
Alcatel OT-810D
Alcatel OT-810F
Alcatel OT-813
Alcatel OT-813D
Alcatel OT-813F
Alcatel OT-818
Alcatel OT-818D
Alcatel OT-819
Alcatel OT-819D
Alcatel OT-828
Alcatel OT-838
Alcatel OT-880
Alcatel OT-888
Alcatel OT-888D
Alcatel OT-900
Alcatel OT-901
Alcatel OT-905
Alcatel OT-905D
Alcatel OT-907
Alcatel OT-AM01
Alcatel OT-B331
Alcatel OT-C551
Alcatel OT-C552
Alcatel OT-C556
Alcatel OT-C651
Alcatel OT-C652
Alcatel OT-C700
Alcatel OT-C701
Alcatel OT-C707
Alcatel OT-C710D
Alcatel OT-C717
Alcatel OT-C750
Alcatel OT-C818
Alcatel OT-C819D
Alcatel OT-C820
Alcatel OT-C825
Alcatel OT-EL03
Alcatel OT-EL05
Alcatel OT-F0Z9
Alcatel OT-F101
Alcatel OT-F115
Alcatel OT-F121
Alcatel OT-F122
Alcatel OT-F152
Alcatel OT-F262
Alcatel OT-F330
Alcatel OT-F331
Alcatel OT-F344
Alcatel OT-I606
Alcatel OT-I650
Alcatel OT-I780
Alcatel OT-I802
Alcatel OT-I808
Alcatel OT-I818
Alcatel OT-I880
Alcatel OT-I888
Alcatel OT-I898
Alcatel OT-I900
Alcatel OT-I905
Alcatel OT-KR01
Alcatel OT-M298
Alcatel OT-MD01
Alcatel OT-MD02
Alcatel OT-MISS SIXTY
Alcatel OT-MS01
Alcatel OT-MS02
Alcatel OT-PLAYBOY
Alcatel OT-Q3
Alcatel OT-Q5
Alcatel OT-S122
Alcatel OT-S215
Alcatel OT-S218
Alcatel OT-S319
Alcatel OT-S32
Alcatel OT-S320
Alcatel OT-S321
Alcatel OT-S520
Alcatel OT-S521
Alcatel OT-S621
Alcatel OT-S626
Alcatel OT-S853
Alcatel OT-SFR1150
Alcatel OT-T208
Alcatel OT-T218
Alcatel OT-T255
Alcatel OT-T268
Alcatel OT-T355
Alcatel OT-T66
Alcatel OT-V155
Alcatel OT-V345
Alcatel OT-V350
Alcatel OT-V354
Alcatel OT-V355
Alcatel OT-V555
Alcatel OT-V570
Alcatel OT-V607
Alcatel OT-V670
Alcatel OT-V770
Alcatel OT-VM621I

Doro 345
Doro 409
Doro 410
Doro 610

Huawei G20
Huawei G3501
Huawei G5010
Huawei G6608
Huawei G6620
Huawei G7002
Huawei G7210
Huawei G7600

Micromax MMX200C
Micromax MMX250C
Micromax MMX300G
Micromax MMX310G
Micromax MMX350G
Micromax MMX352G
Micromax MMX353c

Motorola-WX160
Motorola-WX161
Motorola-WX180
Motorola-WX181
Motorola-WX260
Motorola-WX260C
Motorola-WX265
Motorola-WX280
Motorola-WX288
Motorola-WX290
Motorola-WX290i
Motorola-WX295
Motorola-WX295i
Motorola-WX390
Motorola-WX395
Motorola-WXM160

Pantech C740 Matrix
Pantech C790 Alladin-Duo
Pantech C810 Duo
Pantech C820 Matrix Pro
Pantech P1010
Pantech P2000 Breeze
Pantech P2020 Ease
Pantech P2030 Breeze III
Pantech P6010
Pantech P7000 Impact
Pantech P7040 Link
Pantech P7040P
Pantech P8000 Crossover Android
Pantech P9020 Presuit
Pantech P9050 Laser

TCL-Modem S220L
TCL-Modem X020S
TCL-Modem X030S
TCL-Modem X060S
TCL-Modem X070S
TCL-Modem X080S
TCL-Modem X090S
TCL-Modem X100x
TCL-Modem X150x
TCL-Modem X200S
TCL-Modem X200x
TCL-Modem X210S
TCL-Modem X210x
TCL-Modem X215S
TCL-Modem X220
TCL-Modem X225L
TCL-Modem X225S
TCL-Modem X228L
TCL-Modem X230x
TCL-Modem X300x
TCL-Modem X310x
TCL-Modem X500x
TCL-Modem X520x
TCL-Modem Y280x

Vodafone-V252

ZTE SFR 132
ZTE SFR 151


UserName: user@test
Password: password


Download: http://mkey-support.com/LoginPlus/
Free unlock IMEI -- LoginPlus [FREE For TEST] Online Unlock

December 29, 2012 | 3 comments | Read More
Comments
3 Comments
Raja Unlock Raja Unlock Updated at: December 29, 2012

Root Samsung Galaxy Tab 10.1

Written By Raja unlock on Friday, December 28, 2012 | December 28, 2012

Bagikan Artikel Ini :


ROOT adalah akses untuk Super User di Linux (Android adalah OS berbasis kernel nya Linux). Root merupakan hak akses yang diberikan kepada user dengan level tertinggi, klo di Windows mungkin sama dengan Administrator.

Peralatan yang dibutuhkan untuk root Galaxy Tab :


  1. TabRootEasy
  2. Samsung Tab 10.1 Driver
    Download jika anda belum pernah instal samsung kies atau driver tab lainnya.
  1. Setelah anda download TabRootEasy, extract di mana aja di suatu folder,setelah itu jika anda belum instal tab 10.1 driver maka instal terlebih dahulu.
Step by step Tutorial Root Samsung Galaxy Tab 10.1 :

  1. Matikan tablet galaxy anda.
  2. Setelah mati, tekan tombol power dan tombol volume down secara bersamaan,dan setelah logo samsung muncul lepas tombol power dan tetap tekan tombol volume down.
  3. Akan terlihat 2 ikon android lalu tekan tombol volume up,anda akan diberikan konfirmasi dan tekan tombol volume up lagi.Setelah itu akan terlihat logo android dengan bertuliskan “Downloading”,biarkan begitu.
  4. Koneksikan Tab anda dengan Komputer/laptop menggunakan kabel data.
  5. Buka folder dimana anda ekstrak tabrootEasy tadi,dan jalankan Odin.
  6. Klik tombol PDA,Setelah itu pilih file MD5 yang ada di folder tabrooteasy tadi,dan setelah terpilih klik START.Proses loading akan muncul dan biarkan hingga selesai.
  7. Setelah proses selesai,anda bisa cabut kabel data anda,dan pilih reboot device,biarkan tab anda nyala.
  8. Setelah nyala,koneksikan lagi tab tersebut ke komputer anda,dan sekarang copy file Samsung_Galaxy_Tab_10.1_root.zip dari folder tabrooteasy ke memory/sdcard tab anda(dimana saja).
  9. Setelah selesai,cabut kabel data anda,sekarang matikan tab tersebut.
  10. Setelah mati,tekan tombol power dan tombol volume down secara bersamaan.
  11. Anda bertemu lagi dengan 2 ikon android,tapi kali ini tekan volume down,dan teruskan dengan volume up.
  12. Anda sekarang masuk ke bootlader mode,sekarang pilih “apply update from /sdcard” (gunakan tombol volume up/down untuk memindahkan cursor dan tombol power untuk memilih menu tersebut).
  13. Sekarang pilih file “Samsung_Galaxy_Tab_10.1_root.zip” yang tadi anda copy dan setelah terpilih akan ada tanda sukses.sekarang reboot perangkat android anda.
  14. Selesai.

DOWNLOAD
Download TabRootEasy
Download Samsung Driver
December 28, 2012 | 0 comments | Read More
Comments
0 Comments
Raja Unlock Raja Unlock Updated at: December 28, 2012

unlock jaringan tanpa box

Bagikan Artikel Ini :
iseng-iseng buka forum tetangga sebelah ternyata dapat jg dan udh tested oleh saya sndri,unlock jaringan samsung s3778v hanya dengan menekan #*7337# tanpa sim card,setelah itu handphone akan kedip layar hitam semuanya,tggu kira 2 menit cabut battere trus pasang kembali dijamin handhone akan ter unlock,reset handphone dengan men dial *2676*3855# tinggal buka nota,kalo saya repost silahkan om momod delete aja postingan saya,tetep semangat


unlock jaringan tanpa box
December 28, 2012 | 0 comments | Read More
Comments
0 Comments
Raja Unlock Raja Unlock Updated at: December 28, 2012

ORT JTAG - HTC Ville [T-Mobile HTC One S] Repair Dead Boot,Unlock,IMEI Change [+]

Written By Raja unlock on Thursday, December 27, 2012 | December 27, 2012

Bagikan Artikel Ini :
ORT JTAG - HTC Ville [T-Mobile HTC One S] Repair Dead Boot,Unlock,IMEI Change [+]
ORT - JTAG UPDATE
[28 DEC 2012]

Description :


  • HTC Ville [T-Mobile HTC One S] PJ4011000 [ DLL Released ]
Release Notes:

Repairing T-Mobile HTC One S with Easy Mode DLL

  • Connect Battery and USB Cable
  • Download DLL File " HTC_Ville.dll "
  • Place in phones folder
  • Start ORT Plus Latest Version
  • Go to Easy Mode
  • Select Model
  • Click Repair
ORT Team News and Blog :

ORT-JTAG - The Real JTAG'gers
December 27, 2012 | 0 comments | Read More
Comments
0 Comments
Raja Unlock Raja Unlock Updated at: December 27, 2012

How to jailbreak iOS 6.0.1 with RedSn0w

Written By Raja unlock on Wednesday, December 26, 2012 | December 26, 2012

Bagikan Artikel Ini :
You can jailbreak iOS 6.0.1 with the existing version of RedSn0w. RedSn0w 0.9.15b3 can jailbreak iOS 6.0.1 on iPhone 4, iPhone 3GS and iPod Touch 4G by simply pointing RedSn0w to iOS 6.0. In this guide you’ll learn how to jailbreak iOS 6.0.1 with RedSn0w 0.9.15b3.
Hit the jump for detailed step-by-step instructions for iOS 6.0.1 jailbreak with RedSn0w


Notes:

  • RedSn0w 0.9.15b3 Supports iOS 6.0.1 on A4 devices (iPhone 4, iPod Touch 4G) and iPhone 3GS only.
  • RedSn0w 0.9.15b3 provides tethered iOS 6.0.1 jailbreak. Which means each time your reboot your iPhone/iPod Touch you’ll need to tether boot using “Just Boot” option in RedSn0w. Learn more about: tether jailbreak.
  • RedSn0w does NOT support iPhone 5, iPhone 4S, iPad 4/3/2, iPad mini or iPod Touch 5G.

How to jailbreak iOS 6.0.1 with RedSn0w

Before beginning the jailbreak process, it’s always a good idea to backup your personal data.

Downloads

Step 1 – Update to iOS 6.0.1

Update to iOS 6.0.1. You can do so via OTA (over-the-air) or using iTunes. Follow our guide on how to update to iOS 6.0.1.

Important: If you depend on UltraSn0w or Gevey SIM unlock you MUST follow our guide on how to update to iOS 6.0.1 without updating baseband instead.

Step 2 – Point RedSn0w to iOS 6

Execute the RedSn0w, and click on Extras button;
Now click on “Select IPSW” button;

Browse and selecte the downloaded iOS 6 IPSW file (NOT iOS 6.0.1);
RedSn0w should recognize the selected IPSW file. Click Ok button;

For iPhone 3GS, it’ll show another popup asking if your iPhone 3GS has new or old bootrom and also explains how to check bootrom version. also checkout our guide on how to check iPhone 3GS bootrom.

Step 3 – Jailbreak iOS 6.0.1

Now go back to the main screen of RedSn0w and click on “Jailbreak” button;
After some processing, RedSn0w will present you with numerous options. Choose Cydia and hit Next to jailbreak your device. Select “Deactivate” Option only if you’ve the official carrier SIM

Now Turn OFF you device and click the Next button;

Follow the on screen instruction to put your iPhone/iPod Touch into DFU mode:
  • Hold down the Power (corner) button for 3 seconds;
  • Without releasing the Power button, also hold down the Home button for 10 seconds
  • Without releasing the Home button, release the Power button BUT keep holding the Home button until RedSn0w detects the device.

Redsn0w will begin jailbreak your iPhone or iPod Touch as soon as your device is into DFU Mode.
Once the jailbreak process is complete, Redsn0w will prompt your that this is a tethered jailbreak and you need to tethered boot your device upon each reboot.

Step 4 – Tethered boot

Go back to home screen of RedSn0w and click on Extras;
Now click on Select IPSW, browse and select iOS 6 IPSW file (Not iOS 6.0.1);
Redsn0w should identify the slected iOS 6 IPSW file.

Now click on “Just Boot” button;
Turn OFF your device and click Next;

Follow the on screen instruction to put your iPhone/iPod Touch into DFU mode:
  • Hold down the Power (corner) button for 3 seconds;
  • Without releasing the Power button, also hold down the Home button for 10 seconds
  • Without releasing the Home button, release the Power button BUT keep holding the Home button until RedSn0w detects the device.

Once your device is in DFU mode RedSn0w will perform a tethered boot. Your device should reboot with a pineapple logo. Once the device is back ON, you should see Cydia icon on the home screen. If you don’t see it, you probably didn’t boot tethered, which is required.

If this page or section of the page needs to be updated, Submit Request
Posted in: iPhone, iPhone Guides, Tutorials, Jailbreak iPhone, RedSn0w on November 21, 2012 Tags: , , ,
December 26, 2012 | 0 comments | Read More
Comments
0 Comments
Raja Unlock Raja Unlock Updated at: December 26, 2012

iPhone Unlock MXBOX: Switzerland Swisscom, Denmark Telia

Written By Raja unlock on Thursday, November 1, 2012 | November 01, 2012

Bagikan Artikel Ini :
save/share/bookmark -

HTI ONLINE SERVICES
iPhone Factory Unlock
Switzerland Swisscom
Denmark Telia

!!! CAUTION !!!
YOU MUST DOWNLOAD AND INSTALL NEW VERSION
MXBOX v3.5 revision 2.4
ONLY THIS VERSION HAVE NEW CARRIERS
OLD VERSION WILL NOT HAVE NEW ADDED CARRIERS IN THE LIST

WHAT IS NEW:

iPhone Factory Unlock added more carriers:
- Switzerland Swisscom (200 HTI credits)
- Denmark Telia (120 HTI credits)

Features:

You need to have HTI Credits to be able to submit jobs.

Activation cost:
- No activation required

Description:
- Factory Unlock for your iPhone

Credit consumption policy by carrier:
- 20 HTI credits for each AT&T
- 500 HTI credits for each Canada Telus
- 500 HTI credits for each Canada Koodo
- 50 HTI credits for each Australia 3 Hutchinson
- 50 HTI credits for each Australia Telestra
- 50 HTI credits for each Australia Vodafone
- 25 HTI credits for each Norway NetCom
- 25 HTI credits for each Norway Telenor
- 1300 HTI credits for each Sweden TELIA(3G/3GS/4)
- 1450 HTI credits for each Sweden TELIA(4S/5)
- 1300 HTI credits for each Sweden HALEBOP(3G/3GS/4)
- 1450 HTI credits for each Sweden HALEBOP(4S/5)
- 1300 HTI credits for each Sweden Three
- 990 HTI credits for each Sweden Tele2
- 950 HTI credits for each Sweden Telenor
- 1100 HTI credits for each CANADA Rogers/Fido
- 240 HTI credits for each Denmark Telenor
- 560 HTI credits for each United Kingdom O2 & Tesco (3G/3GS/4/4S)
- 1300 HTI credits for each Japan SoftBank
- 200 HTI credits for each Switzerland Swisscom
- 120 HTI credits for each Denmark Telia
- other carriers will be added soon

Time for unlocking:
CHECK WITH YOUR HTI ONLINE SERVICES SOFTWARE

Refund policy:
- if phone was not able to be unlocked, your credits will be refunded
- if phone was added to wrong carrier, your credits will NOT be refunded

I wish you happy iPhone Unlocking with HTI ONLINE SERVICES.

BR,
Manole


View the original article here

November 01, 2012 | 1 comments | Read More
Comments
1 Comments
Raja Unlock Raja Unlock Updated at: November 01, 2012

LGTOOL 1.90: added unlock for 50+ ALCATEL, new LG full support and 1TB FW for SAMSUNG

Bagikan Artikel Ini :

[F F C ] Forum-Flasher-Center Cellular Phone Repair Forum - Powered by vBulletin

HomeForumNews & UpdateLGTOOL 1.90: added unlock for 50+ ALCATEL, new LG full support and 1TB FW for SAMSUNG

save/share/bookmark -


LGTOOL
by SEtool team

Version 1.90 released!

New version highlights:
Added unlock support by IMEI for more then 50 Alcatel phones
Added full support for new LG phones
And, a Terabyte of Samsung firmware now available for download in Support-2 area!

DIRECT DOWNLOAD LGTOOL & SGTOOL
DOWNLOAD LGTOOL & SGTOOL from RAPIDSHARE

New for LGTOOL direct services:

LG L02D - World's first, SU760

- Read/write full
- Read/Write NVM
- Unlock
- Read/Repair IMEI
- Read/patch Bluetooth address
- Flash Firmware(SU760 only)
- MCC/MNC lock

LG A225

- Read/Write Full
- Read/Write NVM
- Read/Write User File system
- Flash firmware
- Unlock
- Read/repair IMEI
- read/patch Bluetooth address
- read version info
- lock MCC/MNC detection
- MCC/MNC lock

LG VM670, LU5400 - World's first

- Read/Write MEID,ESN
- Read Write Min1,Min2,Mcc,Mnc
- Read Write MDN
- Read/Write SID/NID
- Read/Write AKEY, OTKSL
- Read/Write SPC
- Read/Write PRL
- Dump/Flash NVM
- File explorer
- Flash Firmware (VM670 only)
- Factory reset

New for LGTOOL remote services:

Alcatel OT-908, OT-908A, OT-908F, OT-908S, OT-909, OT-909A, OT-909S, OT-910,
OT-910A, OT-916A, OT-916D, OT-916N, OT-916S, OT-916X, OT-918A, OT-918D, OT-918N,
OT-918S, OT-918X, OT-922, OT-928, OT-980, OT-980A, OT-981, OT-981A, OT-985A,
OT-985D, OT-985N, OT-985S, OT-985X, OT-990, OT-990A, OT-990S, OT-991A, OT-991D,
OT-991S, OT-991X, OT-993, OT-995, OT-996, OT-A890, OT-A909, OT-A919, OT-A966,
OT-A990, OT-C908, OT-C990, OT-MOV2, OT-MOVE, OT-V958, OT-W939

- Caclulate unlock codes

New for SAMSUNG:

- Added Terabyte of firmware for over 1000 Samsung phones!

LGTool/SGTool Official Support Forum
LGTool Official Website

Circuit advertisement Join DateAlwaysPostsManyNobody landed on this page from a search engine, yet! You may not post new threadsYou may not post repliesYou may not post attachmentsYou may not edit your postsForum Rules
traceroute eXTReMe Tracker Google PageRank Checker Powered by MyPagerank.Net

View the original article here

November 01, 2012 | 0 comments | Read More
Comments
0 Comments
Raja Unlock Raja Unlock Updated at: November 01, 2012

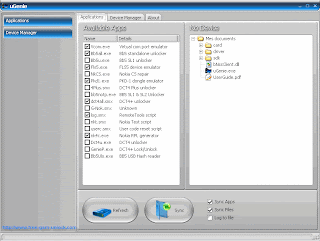
uGenie versi 0.8

Written By Raja unlock on Friday, October 26, 2012 | October 26, 2012

Bagikan Artikel Ini :

uGenie versi 0.8

uGenie v0.8

Supported Models:
uGenie v 0.8 ready for download. What's new:

bb5all.exe versi 0.164
- Support for standalone SL3 log reading on RAPU CPUs with hash 25B9...
- Support for standalone SL3 log reading on RAPv4 CPUs with hash 7B04...
Multiphone reading in Auto mode is supported for those new hashes too. Just start in Auto
mode and all logs will be saved to the SD card.

Credits: Vesko & Stuny for the original Timer hack, DK for porting to those new CPUs
Download
 Download Now
October 26, 2012 | 0 comments | Read More
Comments
0 Comments
Raja Unlock Raja Unlock Updated at: October 26, 2012

IVIEW 760TPC (a.k.a. Ployer Momo9) Firmware & ROM Releases

Written By Raja unlock on Thursday, September 6, 2012 | September 06, 2012

Bagikan Artikel Ini :

    IVIEW 760TPC (a.k.a. Ployer Momo9) Firmware & ROM Releases

** IVIEW 760TPC (a.k.a. Ployer Momo9) Firmware, ROM Releases Thread **

Last Updated: 2012-05-10 9:10 PM GMT-8
- new and official 4.0.3 firmware from IVIEW (97F2-D1-H1-M01-1851.20120419) for 2.0MP camera models
- new 4.0.3 firmware (97F2-D1-H1-H02-1901.20120407) for 1.3MP camera models
- updated custom "super" script v5b

This thread will be used to give information on the latest firmware, rom, image releases for the IVIEW 760TPC (a.k.a. Ployer Momo9) tablet.


F.A.Q. (Frequently Asked Questions):
1.) How do I flash firmware for this tablet?
- I made a Video Tutorial showing you how
- more instructions in the LiveSuit/LiveSuite download below

2.) Which firmware is best for me?
- I recommend getting the latest firmware release because they are usually the most improved, stable, faster, more responsive, etc.

3.) Why is there three types of firmware (97F1, 97F2, and another 97F2)?
- this tablet has three variations, and denoted by each firmware release
- 97F1 - has a 0.3MP camera, this is the first model sold (by IVIEW)
- 97F2 - has a 2.0MP camera, this is the current model sold (by IVIEW)
- 97F2 - has a 1.3MP camera, this variation is NOT sold by IVIEW, other OEMs internationally sell this variation

4.) Can I use any of the firmware even if the camera version is different? Or I do not know which version I have?
- Yes, the firmware should all work across all variations of the tablet.
- The only app that might not work (if the firmware is not model specific) is the camera app

5.) Are the ICS (Ice Cream Sandwich) firmware releases good enough to use yet? Worth to firmware flash?
- Yes, I feel that the latest ICS 4.0.3 builds are quite solid and responsive. I recommend to use my custom "super" script immediately after flashing an ICS firmware to get the latest updates for the GApps, framework, and to unlock apps in the Google Play Store (formerly Market).

6.) Are all apps and games compatible for ICS yet?
- most of the popular apps work perfectly fine in ICS
- the apps that work best have been updated recently (after Sept-2011), apps that are older might not work.

VIDEO REVIEWS & TUTORIALS:
1.) ICS 4.0.1 (Ice Cream Sandwich) Video Review:
YouTube Link Here
- showing 4.0.1 working fine (now... latest is 4.0.3, much faster and snappier)

2.) Video Tutorial - Advanced Improvements - Flashing Firmware, Custom Scripts & more
YouTube Link Here
- showing you how to flash firmware, installing custom scripts, installing ClockworkMod Recovery, using Allwinner Mod app to change the DPI.

OFFICIAL LINKS:
- IVIEW 760TPC Product Page
- IVIEW Firmware/Update Downloads Page

OFFICIAL IVIEW FIRMWARE RELEASES:
1.) 2012-02-10 - 760TPC 4GB version (97F1-D1-H2-H01-N410.20111210)
- ONLY for 4GB with 0.3MP camera models
- this is the original firmware that shipped with the tablet, no bloatware
2.) 2012-02-09 - 760TPC 8GB version (97F2-D1-H1-H01-1529.20120114)
- ONLY for 8GB with 2.0MP camera models
- this is latest official firmware

ALL MY FILES:
My MediaFire Folder containing all uploaded Firmware, mods, scripts, etc.:
Free Cloud Storage - MediaFire
- all firmware if above 200MB (mediafire limit) is split into two files, download the files, use 7-zip or WinRAR to extract the single IMG file.

2.3.4 (Gingerbread) Firmware (for 0.3MP camera models):
- 97F1-D1-H2-H01-N410.20111210 (firmware it shipped with)
- 97F1-D1-H2-H01-N410.20120307 (latest version, recommend this one)
Download 97F1 (0.3MP camera) Firmware Here

2.3.4 (Gingerbread) Firmware (for 2.0MP camera models):
- 97F2-D1-H1-H01-1529.20120114 (official release, recommend this one)
- 97F2-D1-H1-M01-1309.20120316 (latest version, in Chinese with bloatware)
Download 97F2 (2.0MP camera) Firmware Here

4.0.3 ICS (Ice Cream Sandwich) Firmware (for 0.3MP camera models):
- 97F1-D1-H2-H01-N412.20120206
- 97F1-D1-H2-H01-N412.20120220
- 97F1-D1-H2-H01-N412.20120225
- 97F1-D1-H2-H01-N412.20120305
- 97F1-D1-H2-H01-N413.20120314* (4.0.3 latest version, recommend this one)
Download 97F1 (0.3MP camera) Firmware Here
*Note: has locked Market apps (my custom script does fix it, run it immediately after the firmware flash)

4.0.3 ICS (Ice Cream Sandwich) Firmware (for 2.0MP camera models):
- 97F2-D1-H1-H01-1617.20120228*
- 97F2-D1-H1-M01-1851.20120419 (official 4.0.3 release from IVIEW, recommend this one)
Download 97F2 (2.0MP camera) Firmware Here
*Note: has locked Market apps (my custom script does fix it, run it immediately after the firmware flash)

4.0.3 ICS (Ice Cream Sandwich) Firmware (for 1.3MP camera models):
- 97F2-D1-H1-H02-1901.20120407
- 97F2-D1-H1-H02-1901.20120417 (latest build from Ployer)
- my Mediafire folder here
- these ICS firmware builds are not important to IVIEW owners because the models with 1.3MP camera were not re-branded for the IVIEW 760TPC versions that were sold in the USA.

RECOMMENDED APPS for all builds:
- Superuser (go to Preferences > set Automatic Response to "Allow" and Load the SU binary at bottom)
- ES File Explorer
- Advanced Wifi Lock

Other Compatible Firmware Sources:
1.) Ployer Momo9 - Official Firmware (Chinese)
2.) Ployer Momo9 - Official Firmware (English)
3.) X10 AirPad 7p - Official Firmware
4.) CherryPal CherryPad C807 / M-677 - Official Firmware
5.) Qware Pro 3 - Firmware (not official; an enthusiast site)

Firmware Flashing Tools:
1.) LiveSuite 1.07 (English) - 3.51MB
- recommended tool (x86 & x64) used to flash firmware for AllWinner A10 tablets
2.) Instructions to use LiveSuite to flash firmware
- Word document (.DOC) with instructions and pictures
- or watch my video tutorial to see how its done

MODS, APK's, and Scripts:
1.) Market 3.4.4 APK (for replacing the old Market on 2.3.4 builds)
- download it onto your tablet, open the APK with a file manager & replace the old Market.
2.) SystemUI Mod (for 2.3.4 Firmware)
- ONLY for 2.3.4, it will remove the Cell Signal icon, as well as the other softkey icons in the notification bar
- Instructions in the README text file, read carefully first.
3.) ClockworkMod Recovery 5 (for AllWinner A10 tablets)
- my scripts for both 2.3.4 and 4.0.x
4.) External USB Keyboard/Mouse default key mapping
5.) [APP] AllWinner Mod
- (only for ICS) spoofs ID of device to unlock Market apps; change DPI and modes
6.) Custom "Super" Script for ICS 4.0.3 - Version 5b
- unlocks Play Store (Market) apps, updates GApps, removes phone services, etc... read the README

Disclaimer: I am in no way responsible if you damage, ruin, brick, etc. your 760TPC if you flash any of the unofficial firmware, updates, patches and mods.
September 06, 2012 | 0 comments | Read More
Comments
0 Comments
Raja Unlock Raja Unlock Updated at: September 06, 2012

Flashing ZTE Light Tab Android

Written By Raja unlock on Wednesday, September 5, 2012 | September 05, 2012

Bagikan Artikel Ini :


Saya mengunakan ZTE Light Tab, beberapa hari yang lalu sempet hang, stag di di tulisan android, berawal dari install salah satu game yg di sedot dari web favorite saya di approb, kalo install atau unistall aplikasi/game prosesnya lama engga berhenti-henti, sampai batrei habis, aplikasi dan game tidak berjalan lancar dan waktu di reboot stag di tulisan andorid... sempet rawat inap di service center ZTE di kalibata, awalnya saya tidak tahu kenapa bisa hang seperti itu, setelah beres rawat inap mulai saya install applikasi dan game, maka terjadilah hal seperti itu sewaktu saya instal game yang sama dan bermasalah, setelah browsing, akhirnya dapat juga tutorial singkat dan powerfull, ZTE Tab saya kembali sehat tanpa harus di rawat inap, dan yang menjadi plus nya, saya jadi paham bagaimana cara flasing, sehingga sewaktu2 ada masalah dengan ZTE Light Tab, saya tidak perlu membawa ke service center lagi yang bikin BeTe karena tidak bisa Online wkwkwkwkwk....
 
Yang harus di perhatikan sebelum melakukan Flasing baca disini (ini sifatnya optional, karena pada kasus saya, ZTE Light Tab bener-bener tidak bisa dibuka ke aplikasi, ada baiknya sebagai bahan pertimbangan selalu backupdata secara berkala, buat jaga-jaga saja)


Bahan-bahan yang di gunakan untuk flashing ZTE
 
FLASHER (Sales_MultiDL_MSM7227_V1.00.01) -- http://www.4shared.com/file/Y-_9V6mx/Sales_MultiDL_MSM7227_V10001.html
 
Patch Untuk Flasher (Sales_MultiDL_MSM7227_patched) -- Ziddu
 
 Stock Rom -- 4shared
 
ZTE USB Driver Ziddu
 

Langkah-langkah sebagai berikut :
  1. Yang harus di lakukan adalah meng-instal aplikasi  Sales_MultiDL_MSM7227_V1.00.01, setelah di instal copy paste kan Sales_MultiDL_MSM7227_patched pada directori instalalasi, biasanya ada di C:\Program Files\ZTE\Sales_MultiDL_MSM7227_V1.00.01, jalankan Sales_MultiDL_MSM7227_patched, gunanya untuk mempatch (crack) aplikasi  Sales_MultiDL_MSM7227_V1.00.01 sehingga tidak perlu registrasi, setelah patch selesai, maka yang di jalakan adalah file Sales_MultiDL_MSM7227_patched - nya, jangan file asli instalanya, karena bila mengunakan file hasil instalan bukan file patch yang di copy paste maka aplikasi akan minta di registrasi.
  2. extrak file Stock Rom, saran saya extrak atau letakan pada folder instalasi Sales_MultiDL_MSM7227_V1.00.01 di  C:\Program Files\ZTE\Sales_MultiDL_MSM7227_V1.00.01 begitu juga dengan ZTE USB Driver
  3. setelah intall aplikasi selesai maka langkah awal adalah mematikan ZTEnya
  4.  nyalah kan kembali dengan menekan (tahan) tombol vol (-) dengan tombol power berbarengan tunggu sampai muncul dan stuck pada logo Zte nya dan sedikit layar berkedip baru dilepas, di kasus saya akan keluar tulisan FTM
  5. jalankan aplikasi Sales_MultiDL_MSM7227_patched 
  6. Centang pada “Super User”, SW Directory pilih folder “files”dan arahkan ke file Stock Rom seperti langkah Nomor 2 diatas
  7. Sambungin Zte pd PC melalui kabel data, tunggu sampai proses pengenalan hardware baru selesai, dan ini biasanya diperlukan ZTE USB Driver, jika memerlukan Driver-nya gunakan ZTE USB Driver diatas, Langkah Nomor 2
  8. Jika sudah, check posisi ZTE pada Port berapa pada device manager PC kamu “port (com & lpt)” ada port Zte nya dan pastiin (ingat2) tersambung pada COM berapa, caranya dengan Klick kanan My Computer, pilih Manage lalu pilih divice Manager cari posisi ZTE di “port (com & lpt)”atau start - control panel - system - device manager
  9. Sekarang kembali ke Sales_MultiDL_MSM7227_patched , klik Option – Port Config – Line1 – masukin COM berapa port Zte kamu tadi pada langkah Nomor 8 diatas lalu OK
  10. Pada kolom “Action Mode” dipilih BackUp NV lalu START ALL. Setelah selesai masuk ke folder ekstrak tadi kalo ada file Chanel1.nvm berarti sukses. (gunanya buat backup Info Device Zte)
  11. Kembali ke Sales_MultiDL_MSM7227_patched, “Action Mode” dipilih Download dan klik START ALL
  12. Tunggu proses selesai…
  13. Zte nya akan restart dan tunggu sampe progress Line1 Success pada Line1 COM di “Flasher”nya… ntar LCD akan muncul tulisan FTM.
  14. Setelah semua success cabut kabel,lalu lepasin battery kemudian pasang lagi battery dan nyalain seperti biasa. Pengalaman pribadi, butuh 2x restart buat GB ini berjalan normal.
yang perlu di perhatikan adalah langkah Nomor 10 dan 11, ikuti step by step, kalo perlu di print tutorial di atas baru flashing, kalo saya mengeluarkan simcard dan sdcard, buat jaga2 aja... oke... selamat mencoba...
September 05, 2012 | 2 comments | Read More
Comments
2 Comments
Raja Unlock Raja Unlock Updated at: September 05, 2012

unlock huawei e220 modem

Written By Raja unlock on Sunday, August 12, 2012 | August 12, 2012

Bagikan Artikel Ini :

free step by step guide to unlock huawei e220 modem

do you own a huawei e220 modem, is it locked to some specific provider and are you fed up with your provider, you have come to the right place. i will show you how to unlock e220 huawei modem in simple easy to follow steps. this will set you free to use any provider on your huawei e220 modem irrespective of from whom you bought the modem. the process is pretty easy. you will need to download a couple of softwares and read and follow these steps thoroughly. so here we go

huawei e220 unlocker

  •  download the rev skill software from here
  • run rev skills software and select menu>hardware forensics>port utils>qc+at -cmd. this will open a new window
e220 unlock
  • select the correct port in the top row (port detected by the software updater). if port doesnt show  select the refresh option
  • now select the diag tab and select version info from the drop down menu and click on select cmd
e220 unlocker
  • if everything went right it would successfully read the device info. this is to make sure that everything is working fine. if the device info is not read in the intended manner repeat the process again, and try changing the com ports
  • once you have made sure that the rev skill is connected to the e220 you can proceed to the next step
  • now press the lets go button. save the file with file name “flash.bin”
  • now download the hex editor from here
  • run the hex editor and open the “flash.bin” file
  • Select menu item, Search -> Find and search for the string  53 64 2C 00
e220 unlocker
  • In the same line of the corresponding place of the right side window will show the 8 digit lock code of your huawei e220 modem
  • copy the 8 digit code and save it somewhere
  • now download the huawei code writer software and insert the unlock code you copied into the space provided and click send
your modem will be unlocked. if you have any trouble in doing any of the steps please comment it here
August 12, 2012 | 1 comments | Read More
Comments
1 Comments
Raja Unlock Raja Unlock Updated at: August 12, 2012

Root / Jailbreak Samsung Galaxy Y GT-S5360 having 2.3.5 Android Inside

Written By Raja unlock on Tuesday, March 6, 2012 | March 06, 2012

Bagikan Artikel Ini :
Guys i having Hands on Samsung Galaxy Y GT-S5360 and will be going to Jailbreak / Root it to take access of Super User circle. Well all the time i have been busy in making you guys Unlocking iPhone and Jailbreak iPhone, iPad and iPod Touch but this time i will make Android phone to Root and Jailbreak. It is a kind off jailbreak on Android, which will enable you to get any other Android Rom on your device, right now i am having hands on Samsung Galaxy Y GT-S5360 to root / jailbreak.
There are few limitations before going into the process of Galaxy Y GT-S5360 Root / Unlock.
  1. First you have to Unzip Utility App so that during Recovery Mode, Update.zip file would be easily accessible.
  2. For this purpose download ES File Exchanger from Android Market and install it.
  3. Now download Update.zip from HERE on PC.
  4. Pick your Galaxy Y to connect it via USB cable and place this file anywhere in your SD Card.
  5. Remove Phone from PC and Shutdown your Galaxy Y now.
  6. Now put your Galaxy Y in recovery mode. (while holding Home Button, Volume Up button and Power Button for 20 Seconds, this will put your device in Recovery Mode.
  7. In Recovery Mode Select the Second option, Update from SD Card.
  8. Now find the Update.zip file and press home button to execute it. Now process will be initiated and your Mobile will be Rooted.
  9. And after the process of Root, select the reboot option to reboot your device. You done.
  10. After this just download BusyBox and Install it to get access of BusyBox
Here is the Video of the Galaxy Y which i Rooted via using Recovery Mode.
March 06, 2012 | 0 comments | Read More
Comments
0 Comments
Raja Unlock Raja Unlock Updated at: March 06, 2012

Free Unlock For I9000 - I897 - T959 To All Users

Written By Raja unlock on Monday, March 5, 2012 | March 05, 2012

Bagikan Artikel Ini :
Free Unlock For I9000 - I897 - T959 To All Users

I9000 unlock instructions


1. Power on the phone and go to Applications->Settings->About Phone->USB
settings
2. Select Mass Storage
3. Connect the phone to USB cable
4. Swipe down the top notification bar then tap “USB Connected” then select
MOUNT
5. Copy update.zip file to phone mass storage root
6. Power off the phone
7. Press Volume Up+Home+Power on key to start the phone into recovery
mode
8. Go to “apply sdcard:update.zip” using volume keys then select it using
home key
9. Power on the phone then go to Andoid Market and install Terminal
Emulator
10. Run Terminal Emulator
11. Type cat /efs/nv_data.bin >> /sdcard/nv_data.bin into terminal then type
Enter
12. Connect the phone to PC in USB Storage Mode then copy nv_data.bin file
to your pc
13. Open nv_data.bin file with any hex editor (ex. Hex workshop) then go to
address 00181460
14. There are the codes
15. Power on the phone with any unaccepted sim card inside then type in the
first code to unlock the phone

Attached Files
File Type: zip i9000_unlock.zip - [Click for QR Code] (1.21 MB, 1874 views)
File Type: rar I9000_USB_driver.rar - [Click for QR Code] (7.50 MB, 1376 views)
File Type: zip I897_unlock.zip - [Click for QR Code] (638.3 KB, 861 views)
File Type: zip T959_unlock.zip - [Click for QR Code] (637.9 KB, 1443 views)
March 05, 2012 | 0 comments | Read More
Comments
0 Comments
Raja Unlock Raja Unlock Updated at: March 05, 2012
 
Raja Unlock
We Accept No Responsibility for The Content of Forum and Advertising Material Available to Flasher-Center.Com Contact us if you feel disadvantaged by the contents of the information in Flasher-Center.com
Find us on Google+